
Turn your support inbox into tickets, and answer without leaving Hey Customer
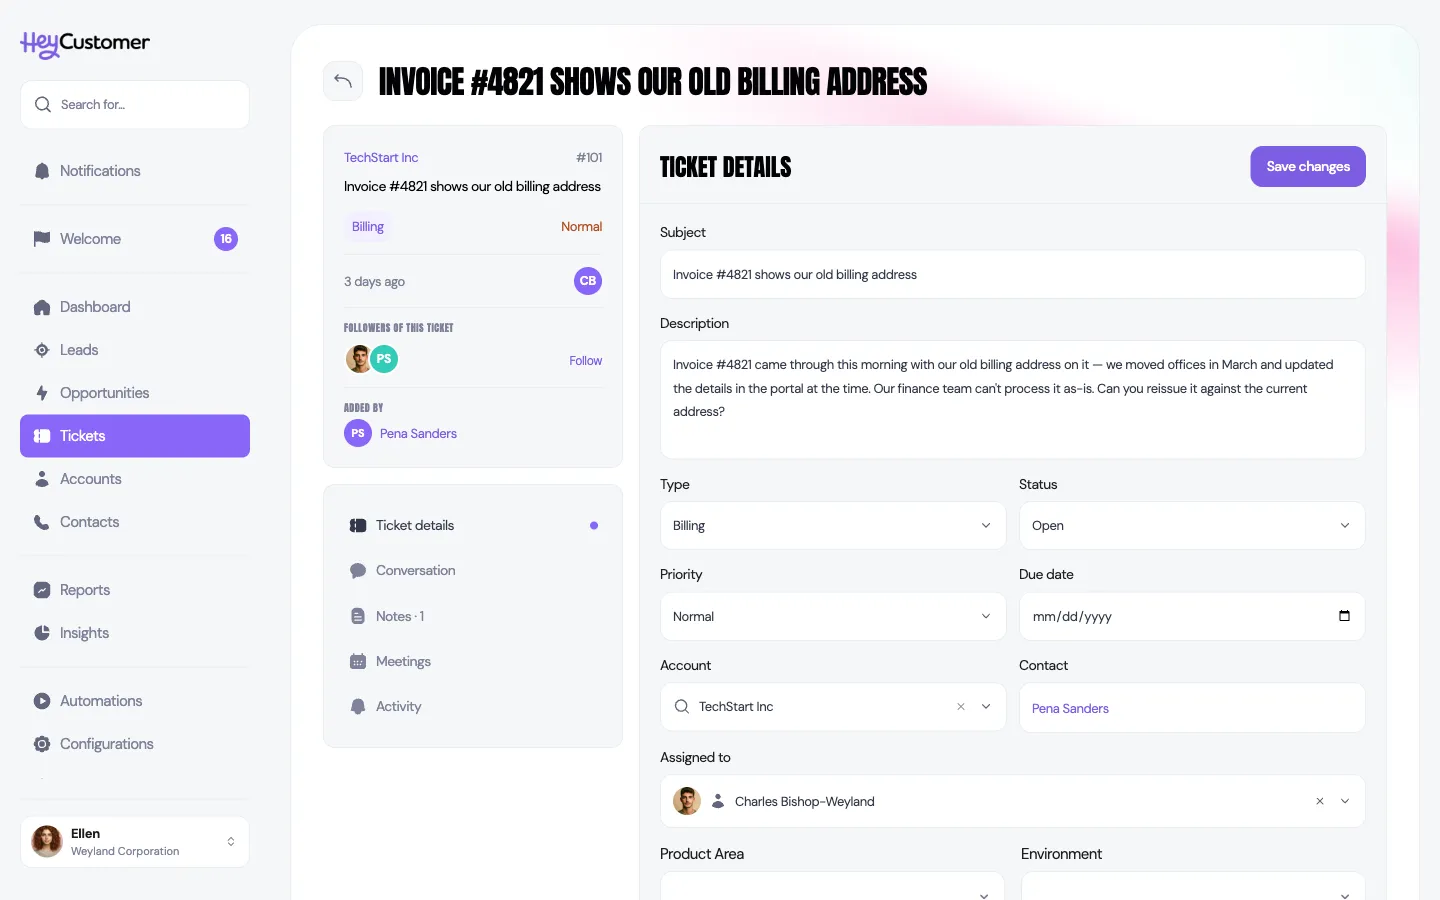
Customers email the support address you already use — support@yourcompany.com, or whatever you've given out — and every message becomes a ticket. Your replies and theirs stay on that ticket, in one thread you both can read.
You choose the address. It lives on a domain your organization controls, so customers write to a name they recognize and nothing about your existing address has to change. You point that address at Hey Customer by adding a forwarding rule in your own mail provider.
Before anything is processed, you confirm the forwarding actually works. Hey Customer emails a test message to your address; if your rule is set up, it arrives back and the address verifies itself. There's nothing to click — the delivery is the proof.
Once it's verified and switched on, a message arriving there creates a ticket using the subject as the title and the body as the first message in the conversation. Hey Customer looks up the sender among your contacts. If it finds a match, the ticket is filed against that person; if not, a new contact is created from their name and address, so you're never left with an anonymous ticket. The sender gets an automatic acknowledgement telling them it's been received.
From there it's an ordinary ticket. You reply from inside Hey Customer, the customer replies to the email they received, and their reply lands back on the same ticket.
There are two inbound addresses you can set up, each with its own switch: the support email, which creates tickets, and the email dropbox, which quietly logs correspondence against your contacts without creating anything. They're separate, and you can run one without the other.
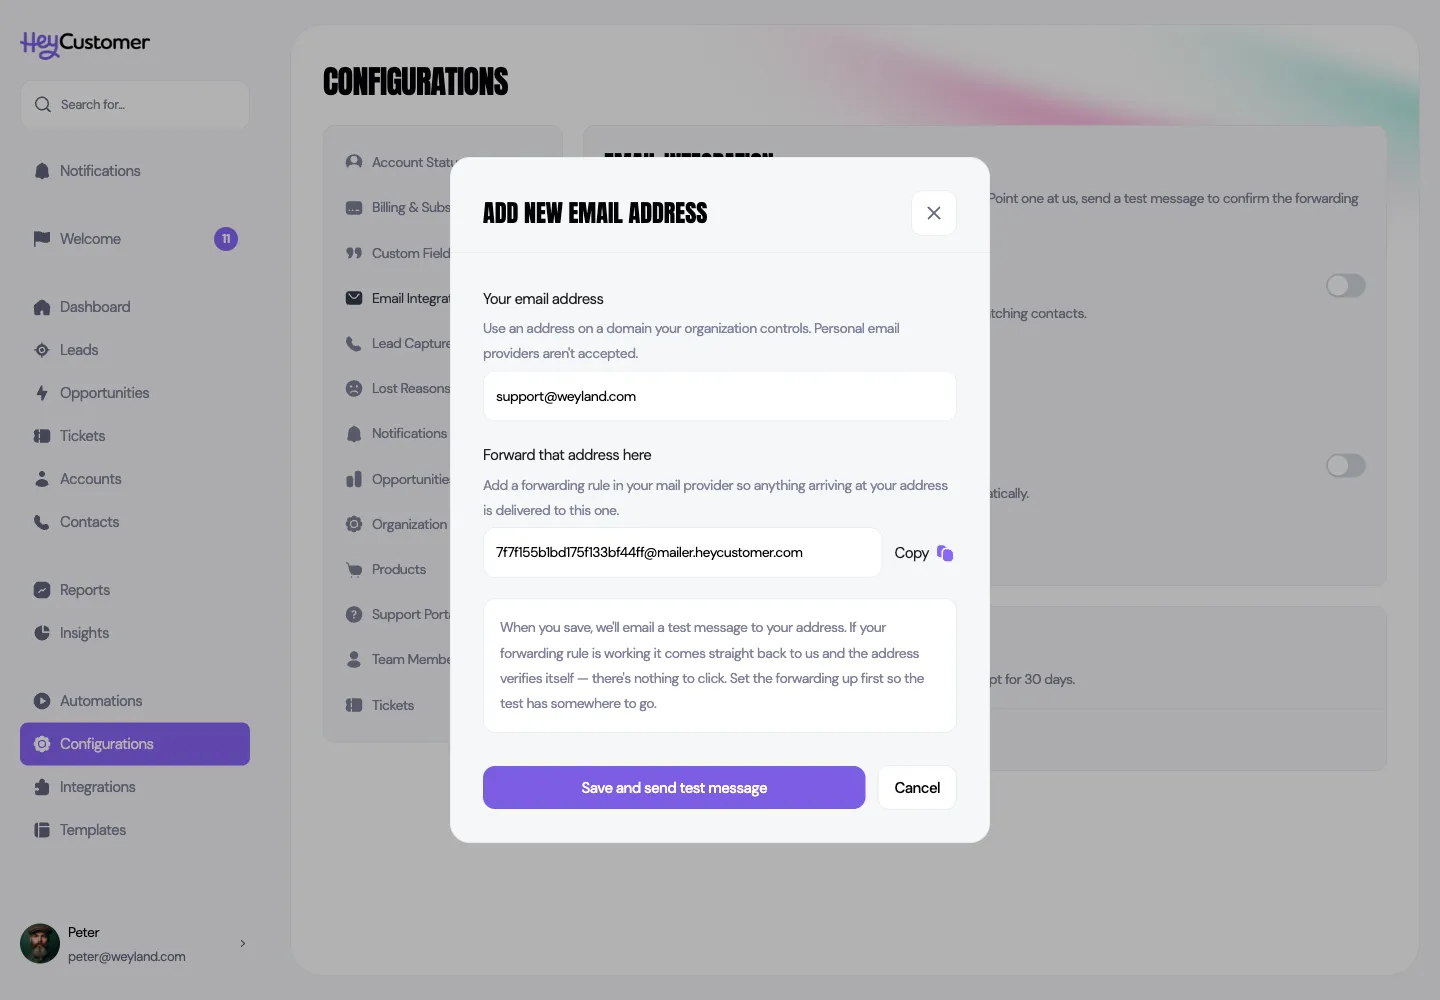
After you save, the address shows Awaiting test message. When our test message completes the round trip it changes to Verified, usually within a few seconds. If it's still waiting after a couple of minutes, the forwarding rule most likely isn't in place yet, or it rewrites the recipient — fix it and select Resend test message.
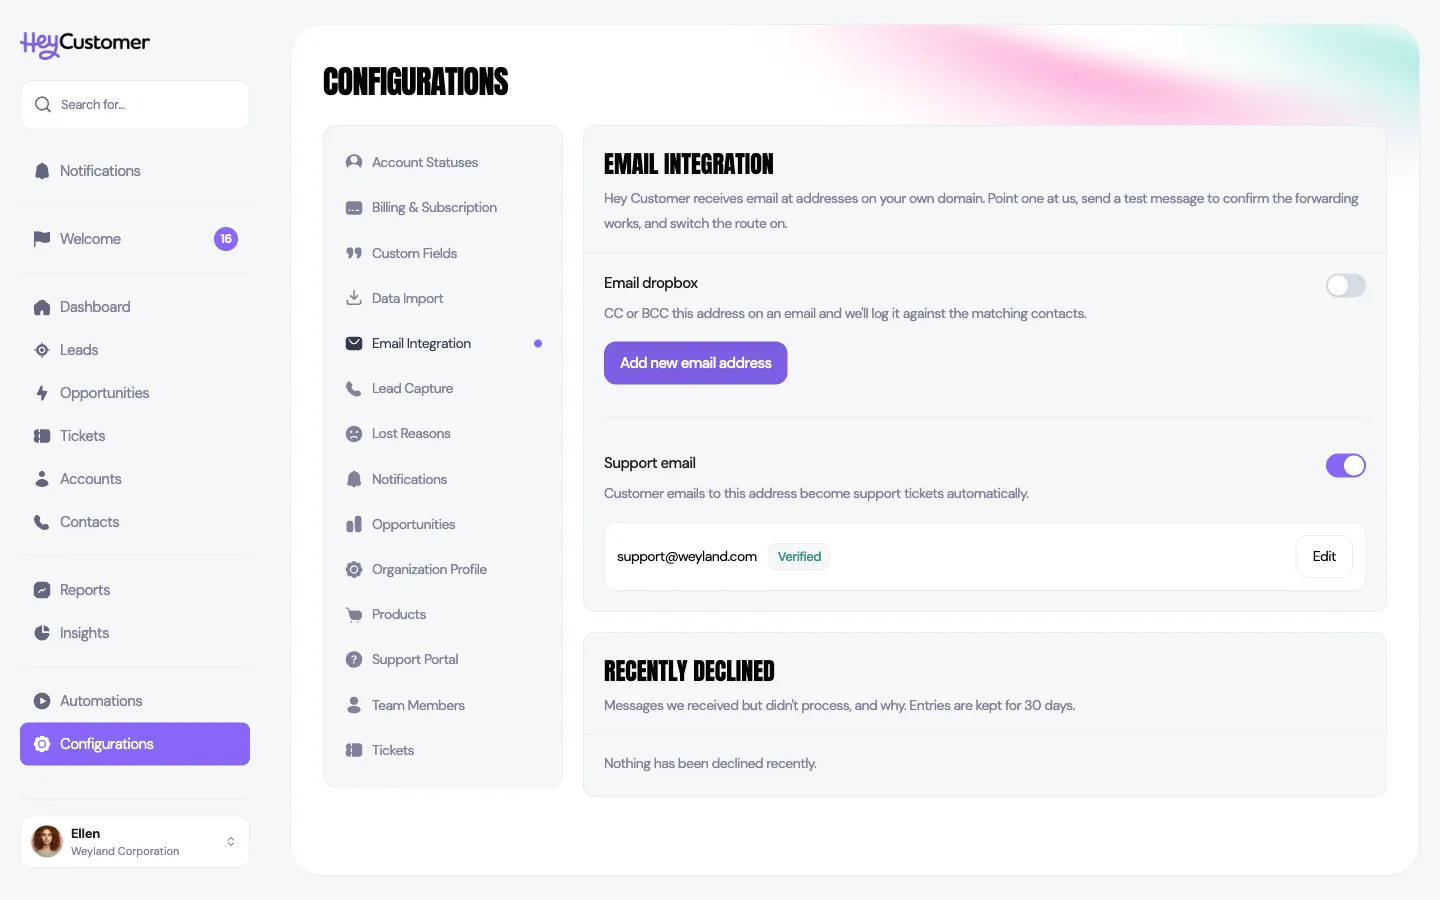
Both things have to be true before anything is processed: the address verified, and the switch on. A verified address with the switch off is ignored, and so is a switched-on route whose address hasn't been verified.
A customer sending an email can't choose a type, status or priority, so you choose on their behalf — once — and every emailed ticket arrives set up that way.
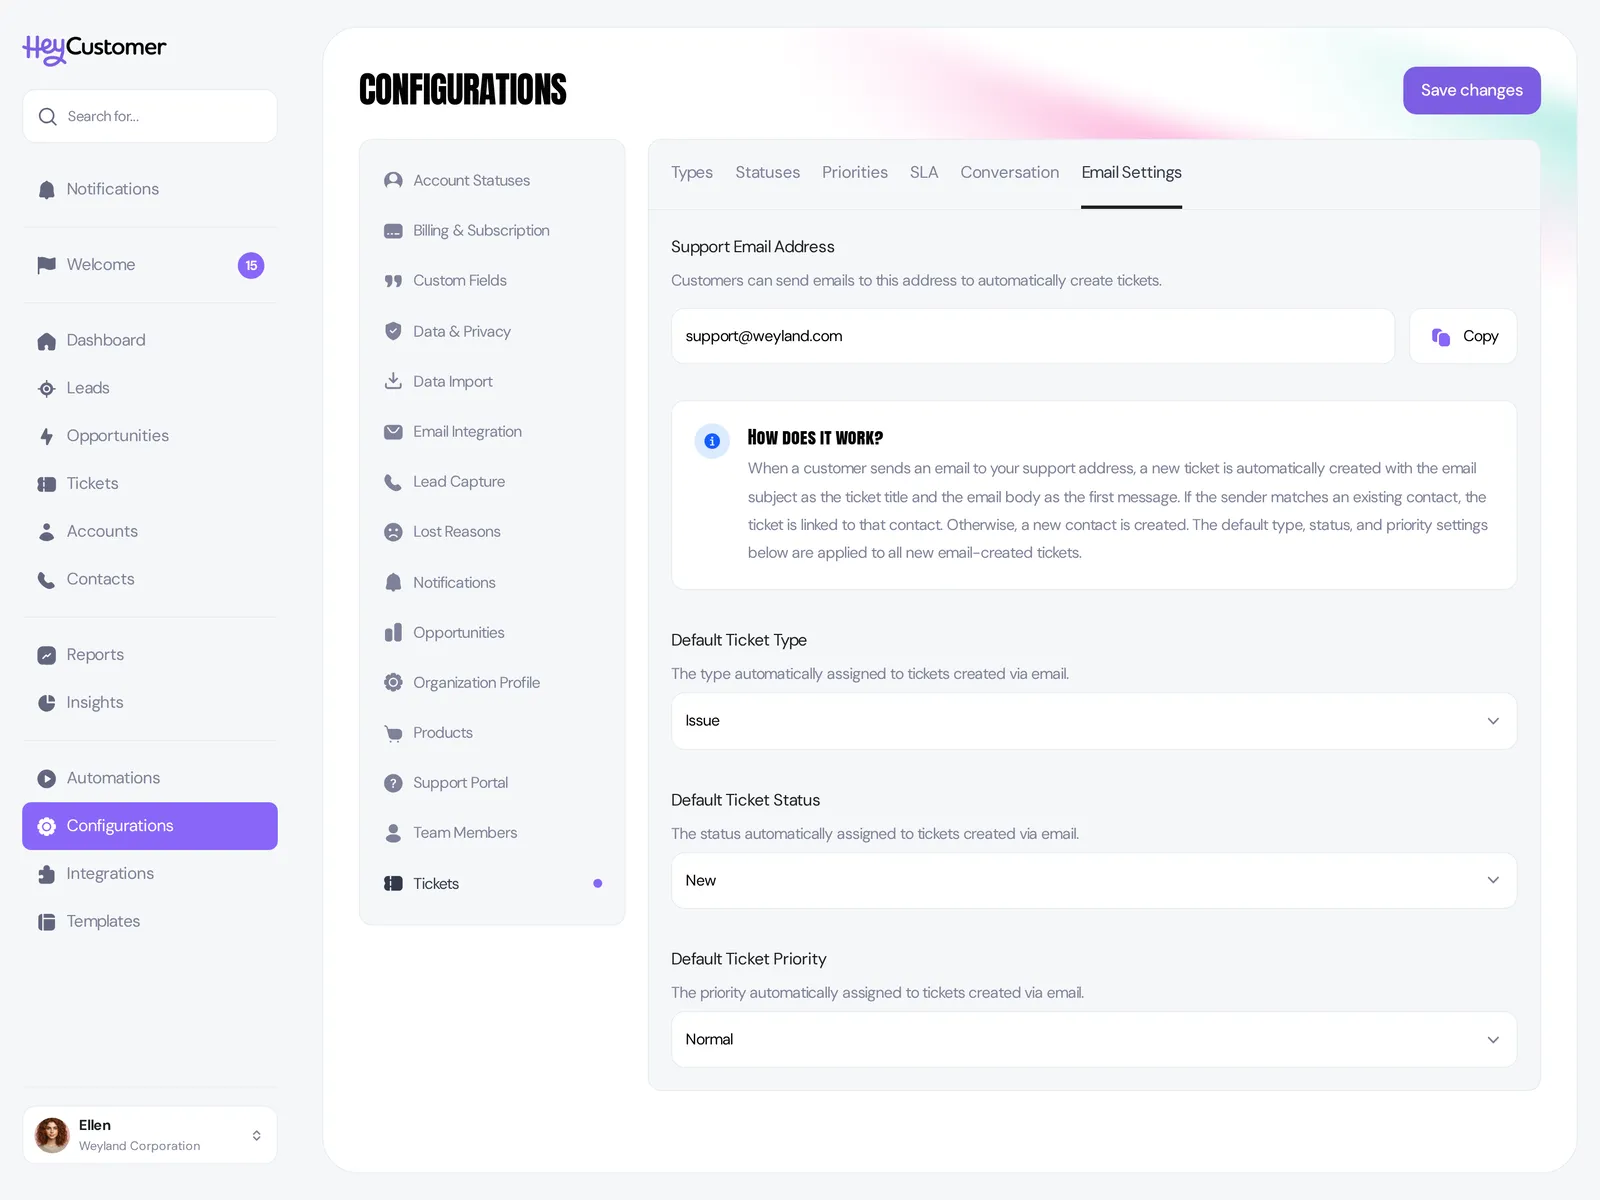
If you leave any of these unset, Hey Customer falls back to the first type on your list, the first status classified as Open, and the first priority.
Matching the sender to a person is automatic. Matching them to the business they work for is something you set up once per account, by claiming their email domain.
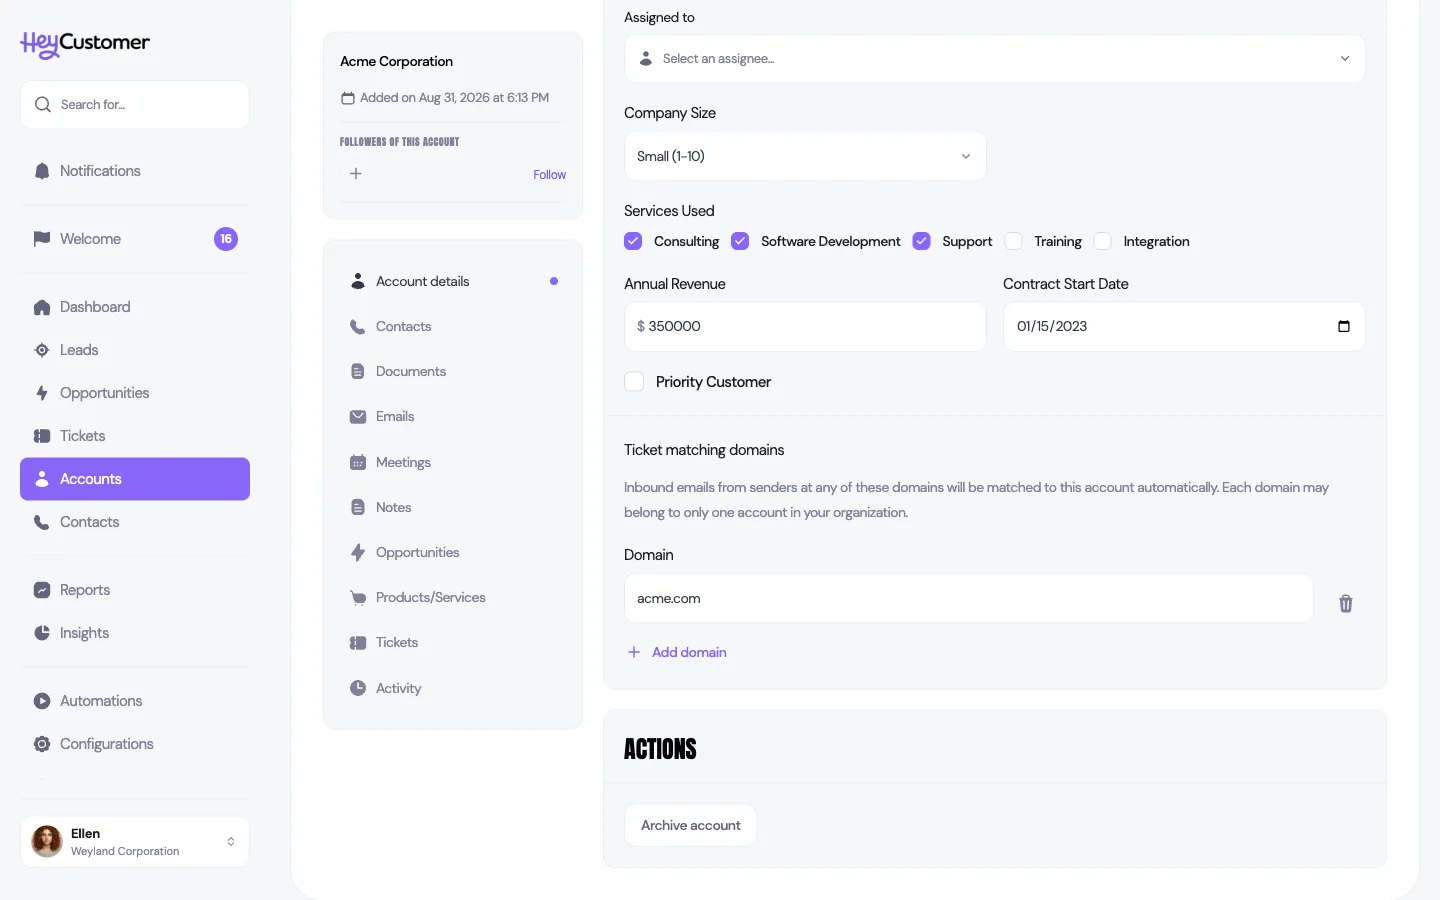
From then on, anyone writing in from that domain gets their ticket filed against the account, even if you've never spoken to them before. New contacts created this way are added to the account too.
Emailed tickets sit in your normal ticket list. Open one and you'll see the sender as the contact, their company as the account if a domain matched, and their message as the description — with the quoted thread from any earlier back-and-forth stripped out, so you're reading what they actually wrote this time.
The list down the left splits the ticket into sections. Ticket details holds the fields and the files; Conversation is everything the customer can see; Notes is what only your team can.
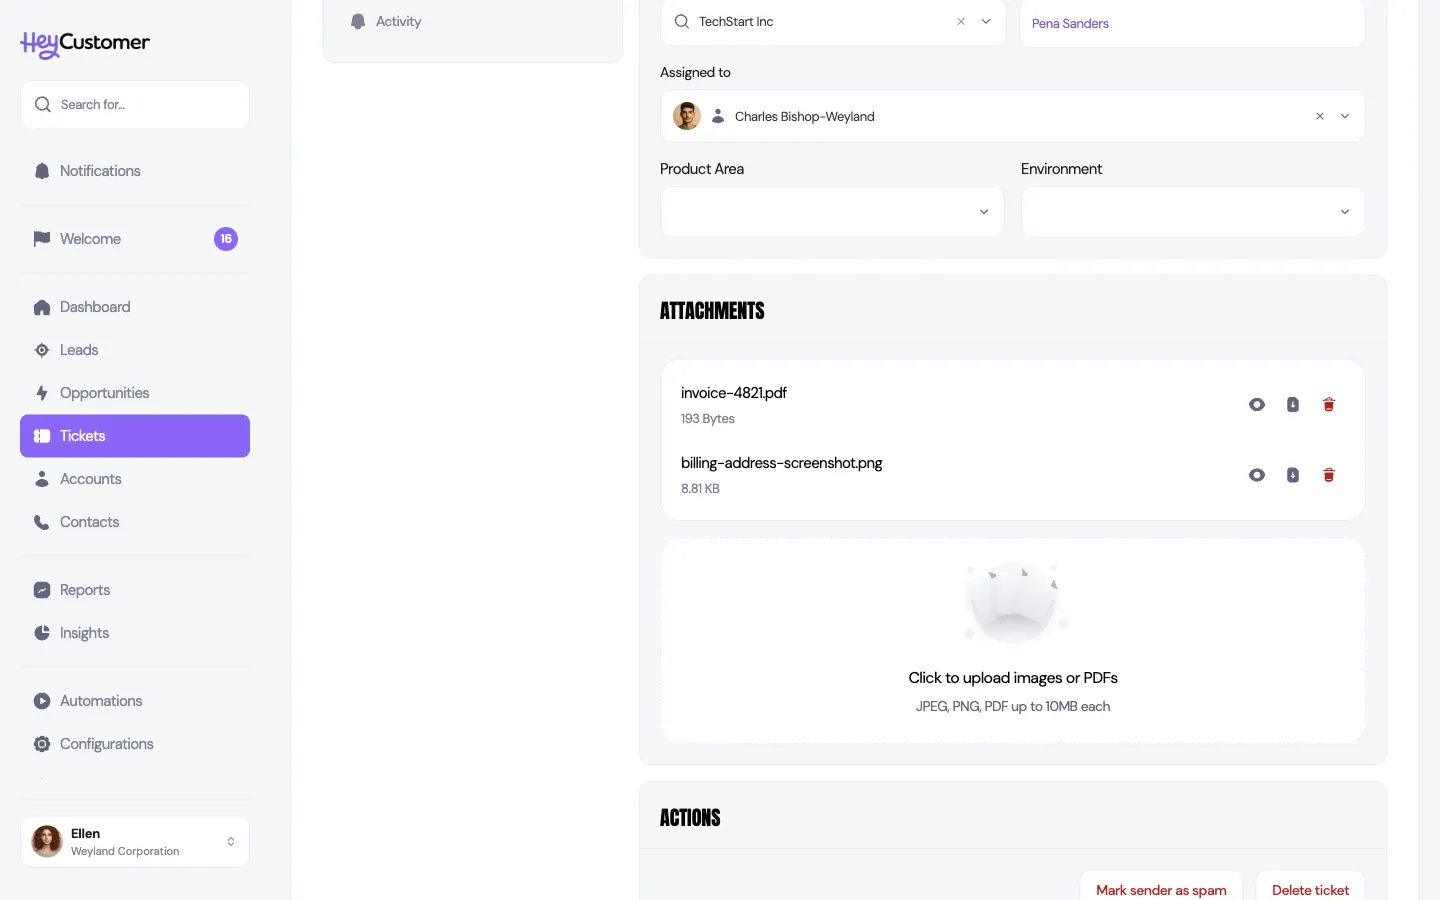
Files that arrive with a request hang off the ticket. They show on the customer's message in the conversation, and again under Attachments at the foot of Ticket details, where you can add your own.
Each file has three icons. The eye opens it for viewing rather than downloading it — an image opens in a preview over the page, and anything else opens in a new tab. The arrow downloads it. The bin removes it from the ticket.
Select Conversation and you'll see the whole thread in order: what the customer first asked, every reply since, and which side of the conversation each message came from. The composer sits at the foot of it.
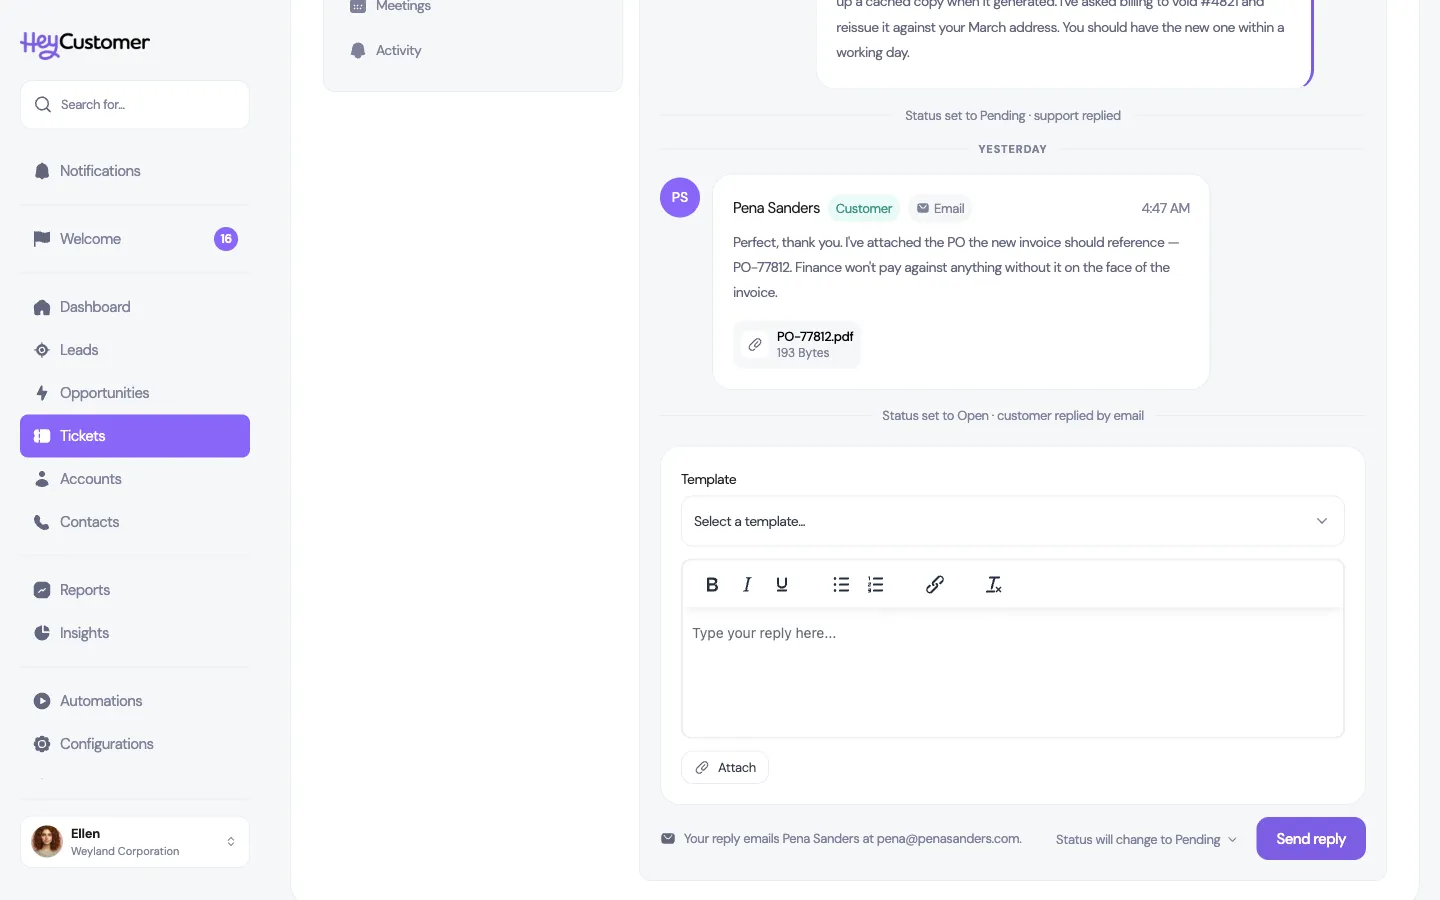
There's no switch to remember. Everything written on Conversation goes to the customer — the section is the audience. The line beside Send reply tells you where it lands before you send it: an email to the contact, a post to the support portal, or both.
If the ticket has nobody on it to reply to, the composer says so instead, and points you at Ticket details to set a contact.
Replies move the ticket's status for you, so nobody has to remember to set it by hand. You choose what each kind of reply does, once, for the whole organization.
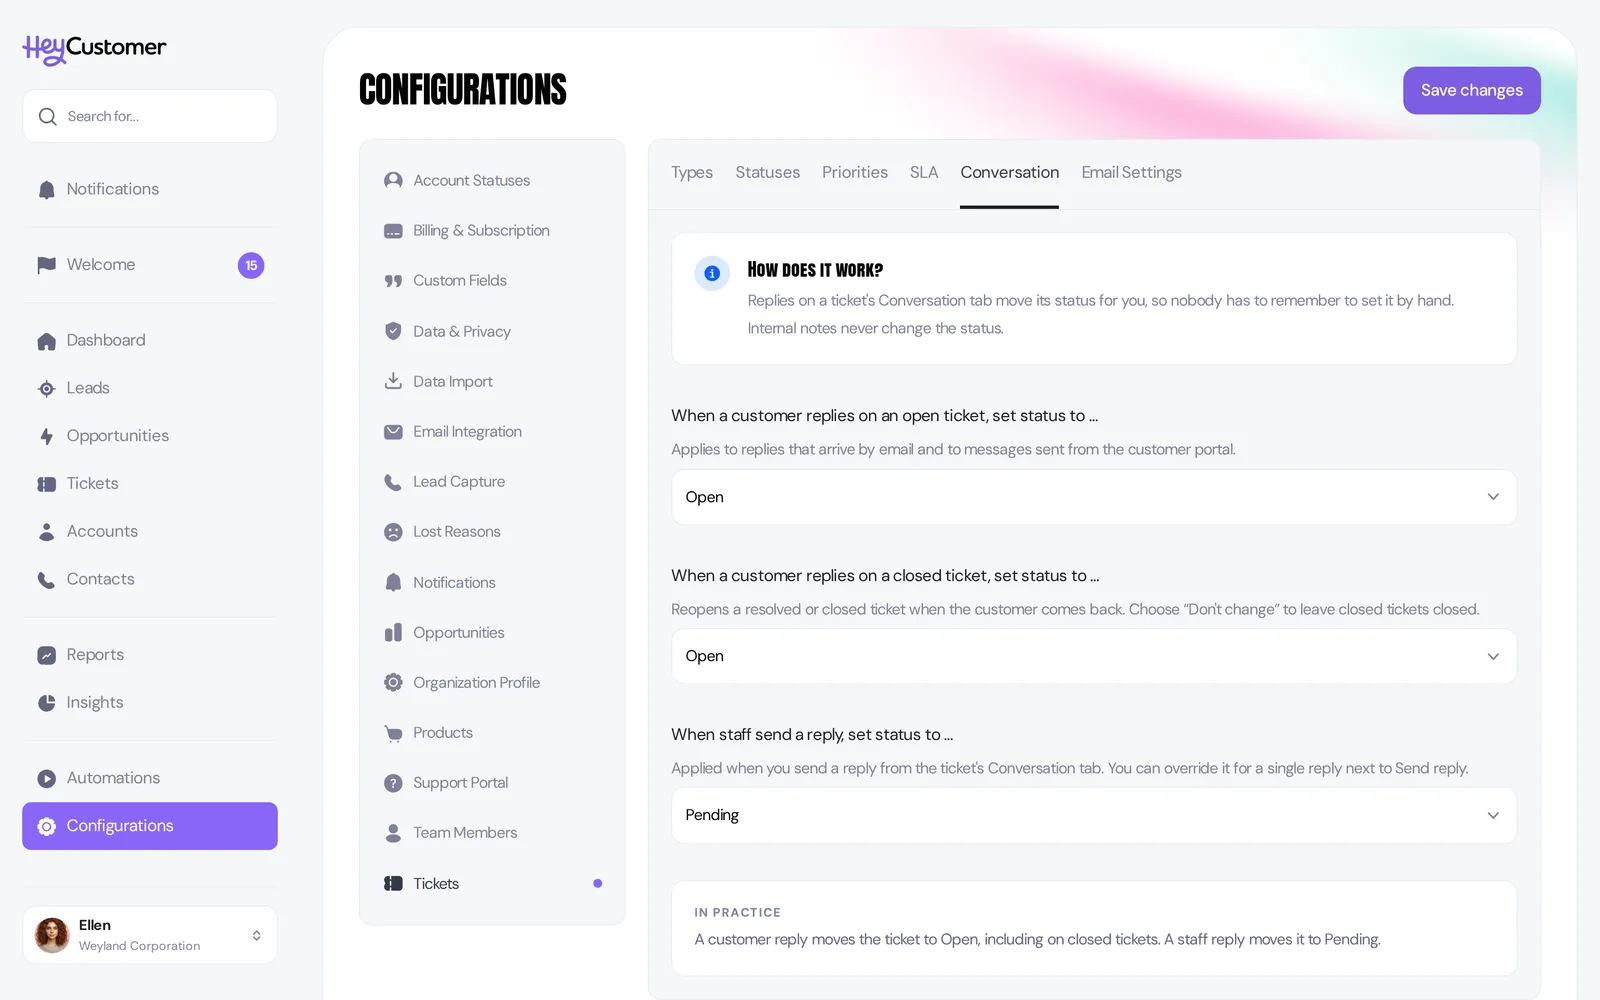
Each rule can be set to any of your statuses, or to Don't change if you'd rather that kind of reply left the status alone. A new organization starts with a customer reply setting the ticket to Open — including on closed tickets — and a staff reply setting it to Pending.
The composer shows the rule it's about to apply next to Send reply. Select it to pick a different status for that one reply, or Don't change to leave the ticket where it is. When a reply does move the status, the move is written into the thread as a line — "Status set to Open · customer replied by email" — so the reason is visible next to the message that caused it.
Anything your team needs to say to each other goes on Notes. The customer never sees it, and it never moves the status.
Each section links to the other, so you can see how long ago the customer last wrote without leaving your notes, and how many internal notes exist without leaving the conversation.
Every email Hey Customer sends about a ticket carries a reply address unique to that ticket. When the customer replies, their message joins the same conversation rather than opening a second ticket. Any files they attach come with it.
Changing a ticket's status emails them as well, so closing a ticket lets the customer know it's resolved without anyone writing a message.
If Hey Customer receives something it won't turn into a ticket, it says so instead of letting the message disappear. At the bottom of Email Integration, Recently declined lists what arrived, who it was from, and why it was turned away — a switch that's off, an address that hasn't been verified, or a message that wasn't addressed to your verified address. Entries are kept for 30 days.
It's the first place to look if a customer says they emailed you and nothing showed up.
If a ticket is junk, you can shut off the sender and clear the ticket in one step.
The ticket is deleted permanently and future emails from that address are ignored without creating anything. The button only appears on tickets that arrived by email and have a contact attached. To let that sender through again later, find them on your Contacts page — filter for spam-flagged contacts to bring them into view — and remove the flag.
Still need help? Email us at support@heycustomer.com